Replacing Maintenance Cartridge
In case of cautions or errors concerning the maintenance cartridge, the Alarm lamp of the printer flashes and a message is displayed on the computer screen.
Check the Alarm lamp status and message and take appropriate action for the error.
 Important
-
If the displayed message indicates that the maintenance cartridge is nearly full, promptly obtain a new one. If the maintenance cartridge becomes full, an error message is displayed and the printer stops working until it is replaced with a new one.
-
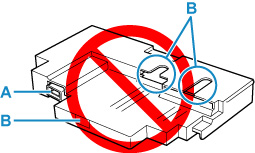
Do not touch the terminal (A) or opening (B) of the maintenance cartridge.
 Note
Note
-
When purchasing a new maintenance cartridge, order the following cartridge number.
Maintenance Cartridge MC-G02
-
Prepare a new maintenance cartridge.
Remove the maintenance cartridge and the attached plastic bag from the package.
-
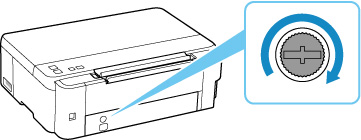
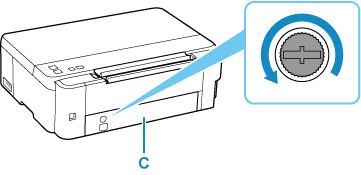
Unlock the coin screw from the maintenance cover (C).
-
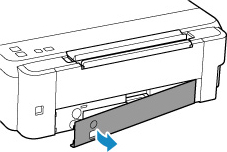
Remove the maintenance cover.
Put your finger on the hole of the maintenance cover and remove it.
-
Pull out the maintenance cartridge until it stops.

-
Lift the maintenance cartridge a little and pull it out.

 Important
-
Be careful not to drop or place the removed maintenance cartridge on a desk or something. Dirt on the bottom may adhere to it or the ink inside may be scattered.
-
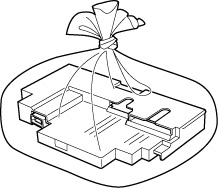
Put the used one immediately into the plastic bag attached to the new maintenance cartridge and seal the bag by tying the opening tightly to prevent the ink from leaking.
-
Do not put your hands inside the printer, as ink may adhere to your hands.
-
Dispose of the removed maintenance cartridge according to local regulations.
-
-
Insert the new maintenance cartridge straight until it stops.

-
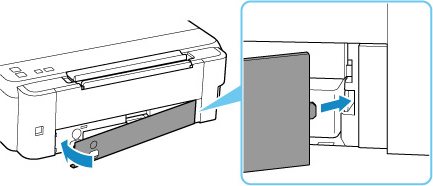
Attach the maintenance cover.
Align the tab on the back of the maintenance cover with the hole on the printer and close it.
-
Insert the coin screw into the screw hole and turn it clockwise to secure.
